Are your kids bored and looking for a fun activity to challenge them? Try building the Circuitmess Nibble!
If you are like me, it’s been a challenge coming up with activities to keep your children busy during these lockdowns and quarantines.
The product we are reviewing today provides many learning opportunities and practical life skills for your eager learners. We will look through the whole process, from ordering, building and the next steps for the Circuitmess Nibble.
Circuitmess Nibble Description
The Circuitmess Nibble is a DIY (Do it yourself) handheld game console. The kit comes with all of the parts you will need to assemble the console.
Through building this kit your child will learn:
– how to Solder components onto a circuit board
– how game consoles are assembled and what parts make up a console
– how to load software onto the console
– how to code their own games (an extra activity after the console is made)
– a huge sense of accomplishment
Disclaimer: I am not sponsored or funded by Circuitmess. I am a programming teacher and thought this product had some great educational potential so I wanted to share my experience and my own thoughts. I assembled this myself to test out the process. No technical background is needed to build this product. Parent involvement is required.
All right let us start!
Ordering the Nibble

I purchased my Nibble from the Circuitmess store. At the time of writing this, they have a 20% early-bird deal. The kit costs $99 CAD, and comes with free worldwide shipping. I have also seen kits sold on amazon, and through select hobby/maker stores here in Canada however quantities are limited and I’m not sure if those stores provide free shipping or not.
Shipping
Circuitmess ships their kits through DHL. The package can be tracked and gives you notifications if they require any updates on the package.
I ordered my kit on Feb 27th and received it on March 3rd (4 days total), well before the “Expected” delivery date of March 8th. I was very happy by the speed of the shipping as it is being shipped all the way from Croatia. It also arrived in perfect shape which is always excellent.
My only issue with ordering was that there is an “Import Duty” on the package, which cost me around $29 CAD which is substantial when I was unaware of any additional fees I would have to pay. This fee may vary depending on your country’s tax and import fees. This is on the shipping company itself, not an issue with the product from Circuitmess.
Building the Nibble
For this build I used Circuitmess’ online tutorial
I have created my own build video here:
The guide is quite comprehensive and has plenty of pictures, notes and supports various languages as well.
Before starting there are soldering guides that are appropriate tutorials first time soldering.
They recommend some extra tools to help with the build process, the only one I found would have helped was the “helping hand” tool.

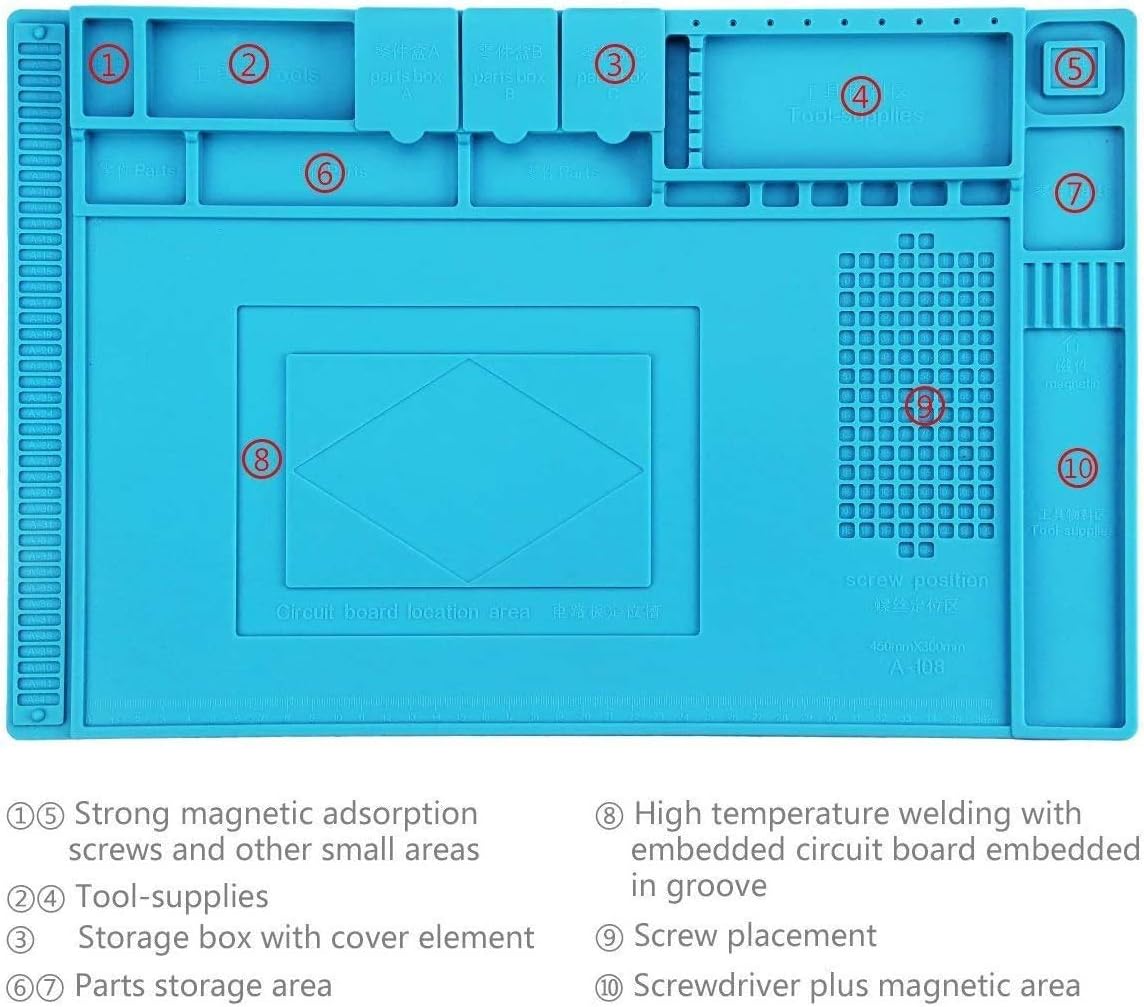
For myself I used everything included in the box except the screw driver as I preferred mine. I also used a soldering mat to help organize components and prevent my desk/work area from being burned.
The build is very straight forward:
- Solder the buttons on
- Solder the power switch on
- Solder the screen on
- Solder the battery container on

Solder the buttons on 
Solder the power switch 
Solder the screen 
Solder the battery
- Insert the fuse
- Insert the batteries and test the console

Insert the fuse above the power switch 
Moment of truth, turn it on and see if it works!
- Peel the plastic off of the acrylic case
- Assemble the back case
- Assemble the front case
- Add the battery cover

Peel off the plastic from the case 
Add the mounts and the back case 
Add the front casing 
Add the battery cover and you’re finished!
I will be releasing a full video build later this month, going further in depth into the build.
Build Challenges
The only things I found slightly challenging with the build was adding the screen and the battery container.
The buttons and the power switch have a feature that allows them to clamp onto the board making soldering easy. The screen does not have that feature which makes it a bit fiddly. You need to carefully lay the console down flat on its face, on the screen itself, when soldering. When you do this, make sure that A) you keep pressure off of the device and the screen so you do not break it and B) that the device is balanced so the screen doesn’t end up soldered on an angle.
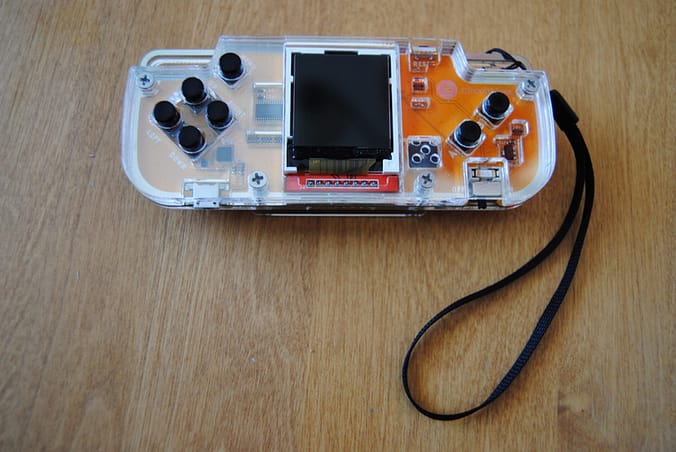
As for the battery container, I had a hard time getting it to lay flat on the back of the device. I’m not sure if my battery container was warped, but it ended up crooked after soldering. You can see how my battery container turned out in the picture below.

I was elated when I turned the device on after soldering to find that there were no issues with it and that it was working 100%! This means that all of the solder joints were done correctly and I did not have to re-do any of them.
Next Steps for the Nibble
After building the device what can you do with it next?
Games
The Nibble comes with 4 games on it: Pong, Space Invaders, Snake, and Asteroids. You can add some more games for it that have been developed by the community, such as this version of Sokoban (a block pushing puzzle game) https://github.com/snsdosen/NibbleSokoban
You can program games for it too! It can run any games programmed in C/C++, Python and CicuitBlocks (Their own graphical programming engine, similar to Scratch)
Mods
Because the Nibble is made from a ESP8266 board, it can be reprogrammed or modified. There is a lot of open-source software that you can freely access and modify.
I will be releasing a few modifications for the system here over the next couple months so stay tuned.
Customize
An easy way to make this device your own is to customize it to tailor your own style.
Some customization options can be simple changes to the case itself like stickers or custom paint jobs.
Conclusion
I thoroughly enjoyed this build. I practiced my soldering skills and will be kept busy developing games, modifications and customizations for this product. I am an online programming teacher, so contact me if you are interested in a class or tutorial to help your child assemble or program their unit. The build was straightforward and easy to do. The feeling of satisfaction from turning the console on after your soldering and having everything work…that was just fantastic!
My only issues with the kit and the whole experience were the unknown import fees, the battery container not sitting flat on my particular unit, and that I wish there was a screen cover. As soon as I gave it to my 4 yr old to try playing, there were smudges all over the screen, so I may have to try building my own screen protector. As for the battery container, I did contact Circuitmess and they responded in less than 12hrs. Talk about fast! They said that the container was fine. It doesn’t affect the performance of the unit so I’m not too worried.
Rating: Build It!

Stay tuned for more content on the Circuitmess Nibble!
Written by Nathan Misener
Need more activities to stay busy? Try our free monthly activities here.

0 Comments
1 Pingback