fbpx Skip to the content
Traveling Chalkboard
  • Online Learning
  • Growth Mindset
  • World Schooling
  • PreSchool
  • Blog
  • Kids Site
  • About Us
  • Store
  • Online Learning
  • Growth Mindset
  • World Schooling
  • PreSchool
  • Blog
  • Kids Site
  • About Us
  • Store

Tag: the parthanon for kids

DIY Toilet Paper Parthenon

October 22, 2020 / jwynands

Toilet Paper Parthenon

Materials: Toilet paper rolls (at least 10), cardboard (enough for the base and roof), scissors, paint, glue stick, paint brush, ruler, pencil.

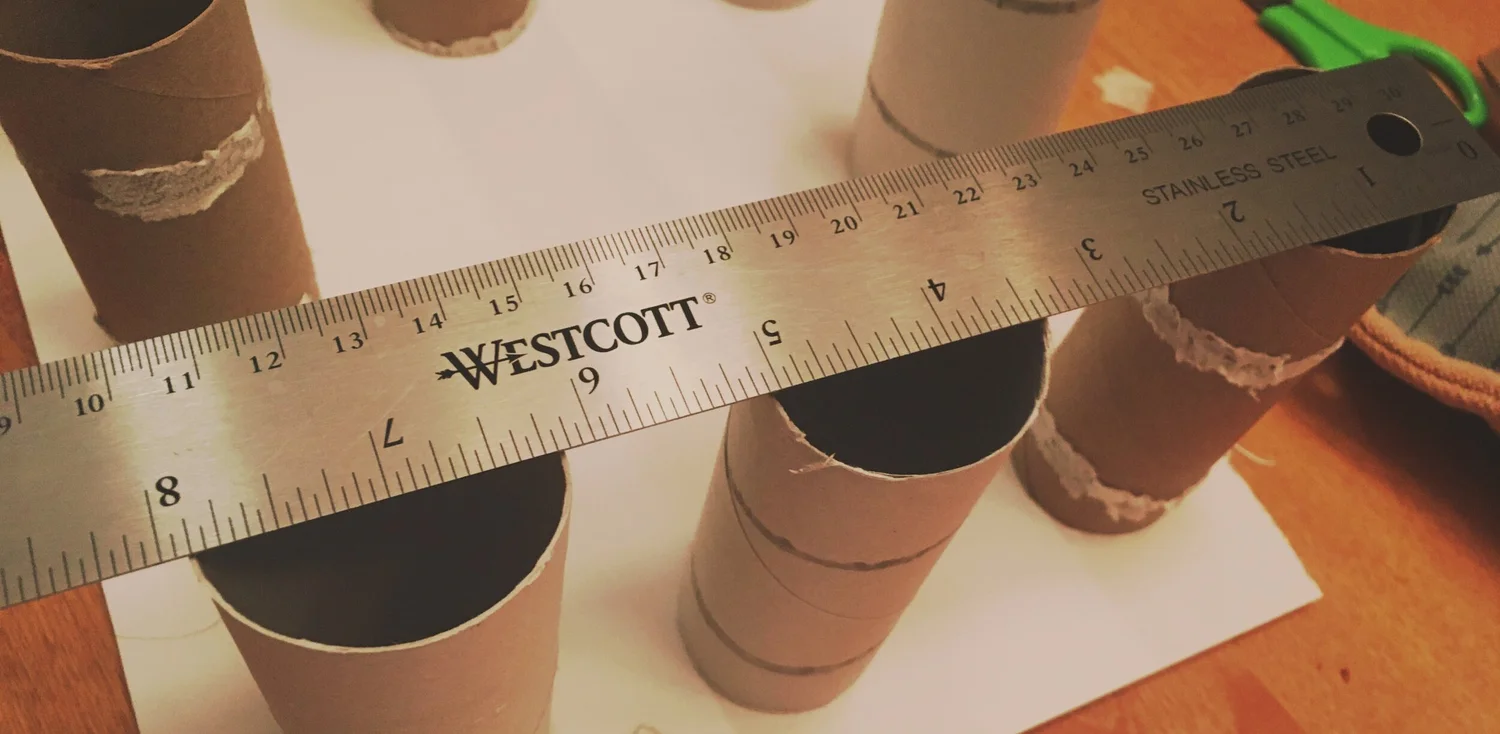
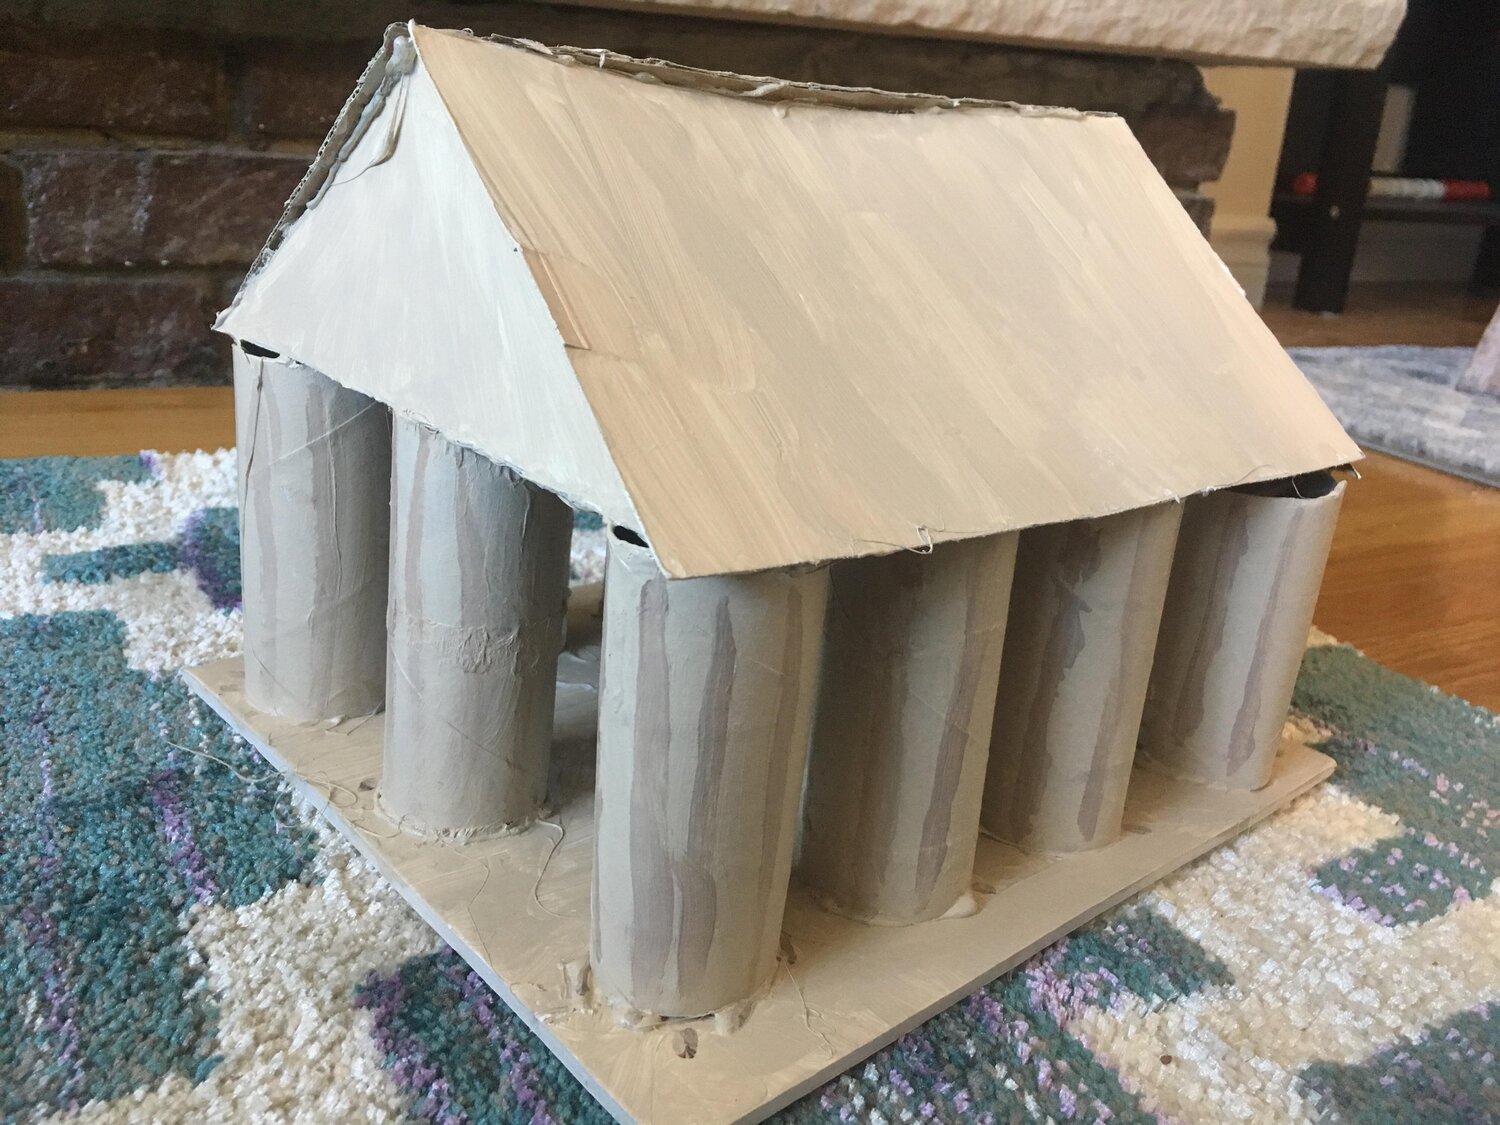
Step 1: Remove any excess toilet paper from toilet paper rolls. Don’t worry if you can’t get the last little bit off.

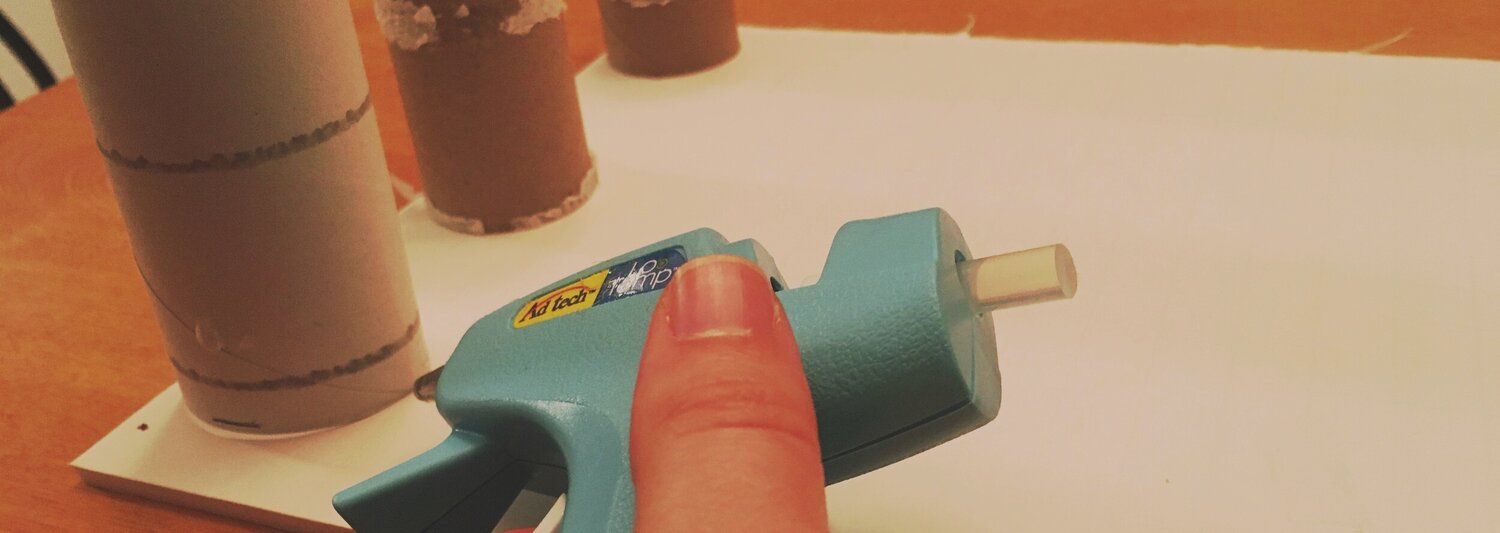
Step 2: Use glue gun to stick the toilet paper rolls around the outside of the piece of cardboard.

91020329_677245403102245_4240771569003003904_n.jpg

Step 3: Draw the triangular pieces that will go between your roof and your pillars.

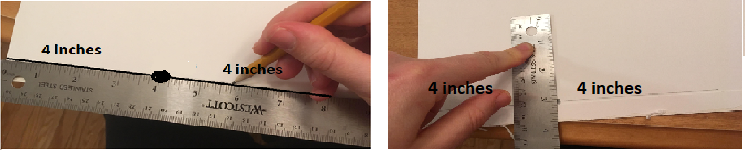
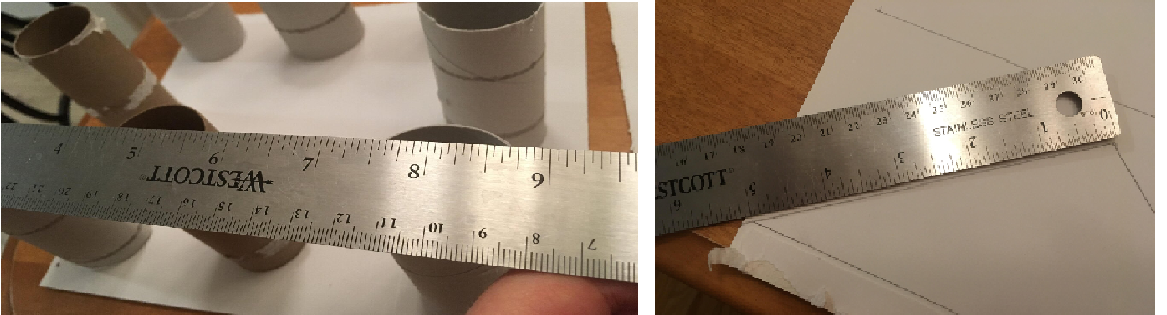
a) Measure the width of your Parthenon. Mine is 8 inches wide.

91152020_674109133357062_8794800477570072576_n.jpg

b)      Draw a line that is the same as the width (I will draw an 8 inch line). This will be the base of your triangle that will go between the pillars and the roof.

Untitled.png

c)      Draw a dot in the exact center of your line. You are going to use this dot to find the point of your triangle.

make the triangle.png

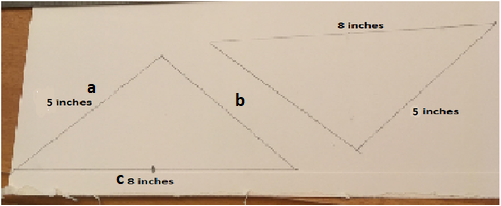
d)      Draw a triangle, making sure the top of the triangle is exactly straight up from the center dot. The taller your triangle is, the taller your roof will be. You should end up with an isosceles triangle, meaning two sides are exactly the same length.

e)      Create a second triangle the same size.

abc triangle sides.png

Step 4: Draw the rectangles that will be used as your roof.

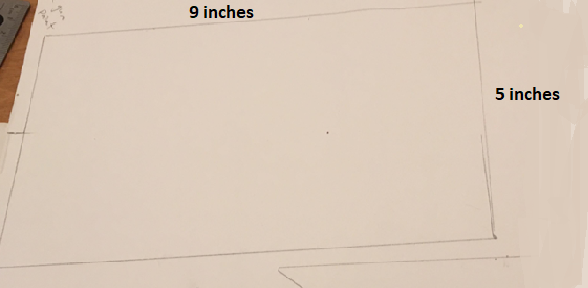
a)     You will need to make two rectangles for your roof. To figure out what size of rectangle you will need, first measure the length of your Parthenon. My Parthenon is 9 inches long. Next measure side a or b of your triangle (they should both be the same length). Side “a” of my triangle is 5 inches.

rectangle measurements.png

a)      Draw two rectangles using these measurements.

rectangle.png

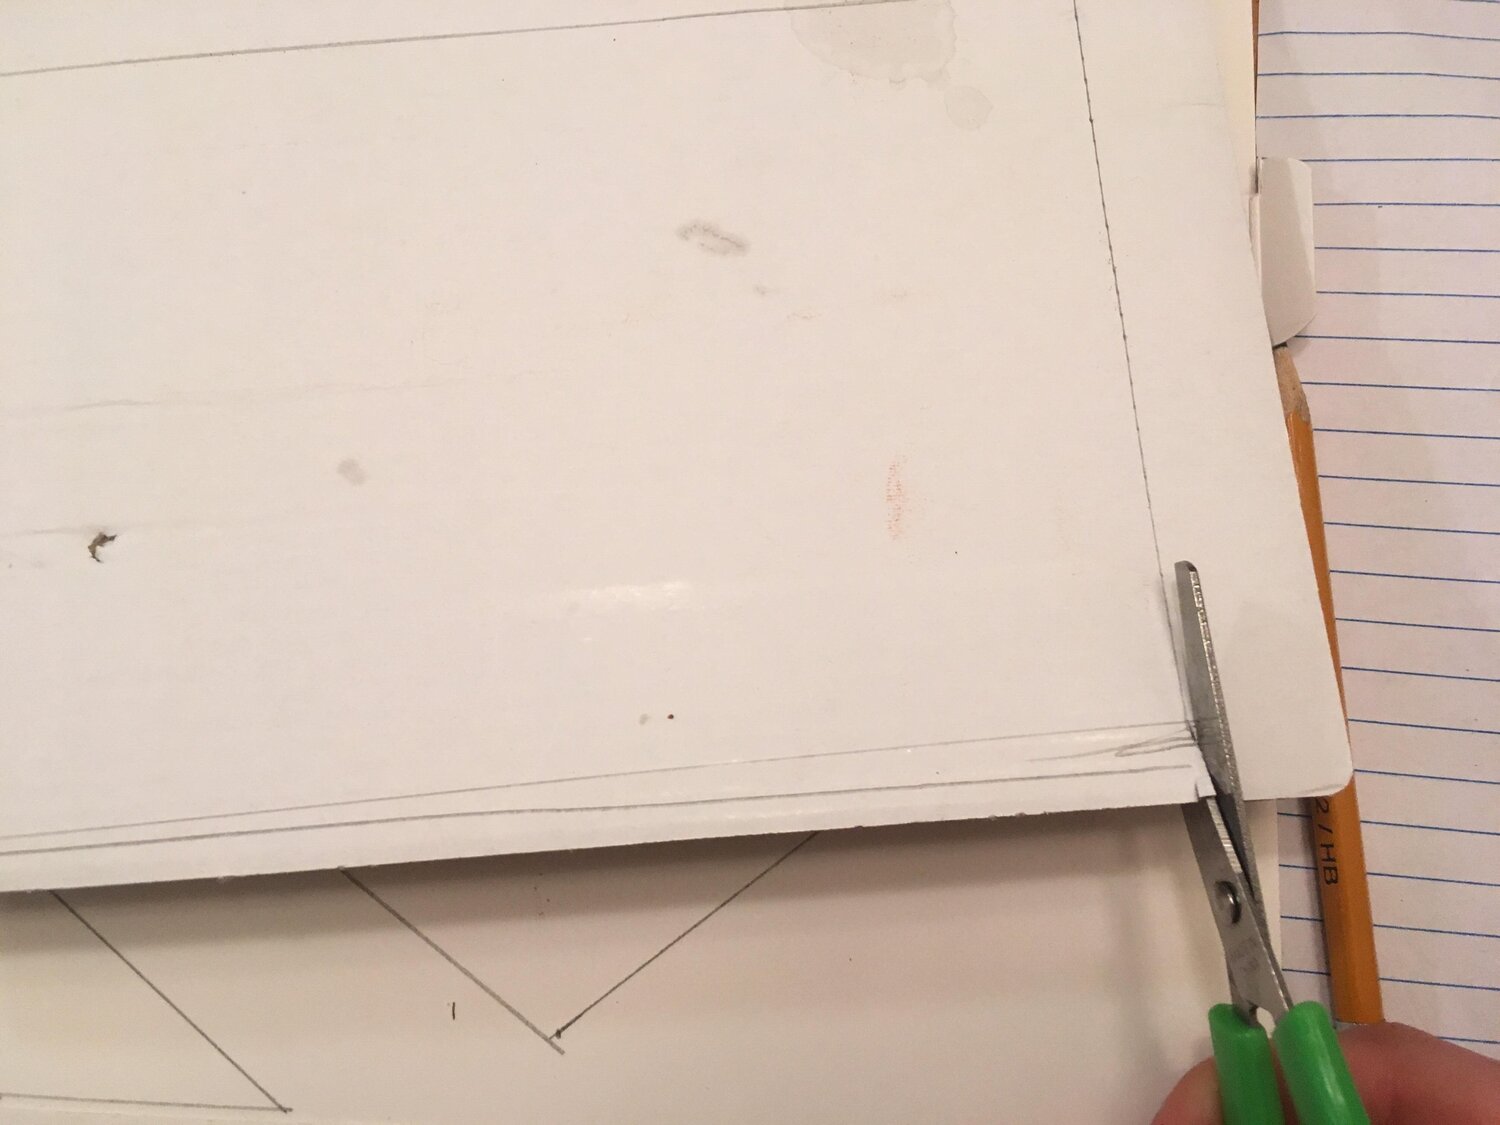
Step 5: Cut out your roof parts

91066843_212348086519770_7712939911250182144_n.jpg

Step 6: Glue your roof together.

91322414_1106674026334525_154302025868247040_n.jpg

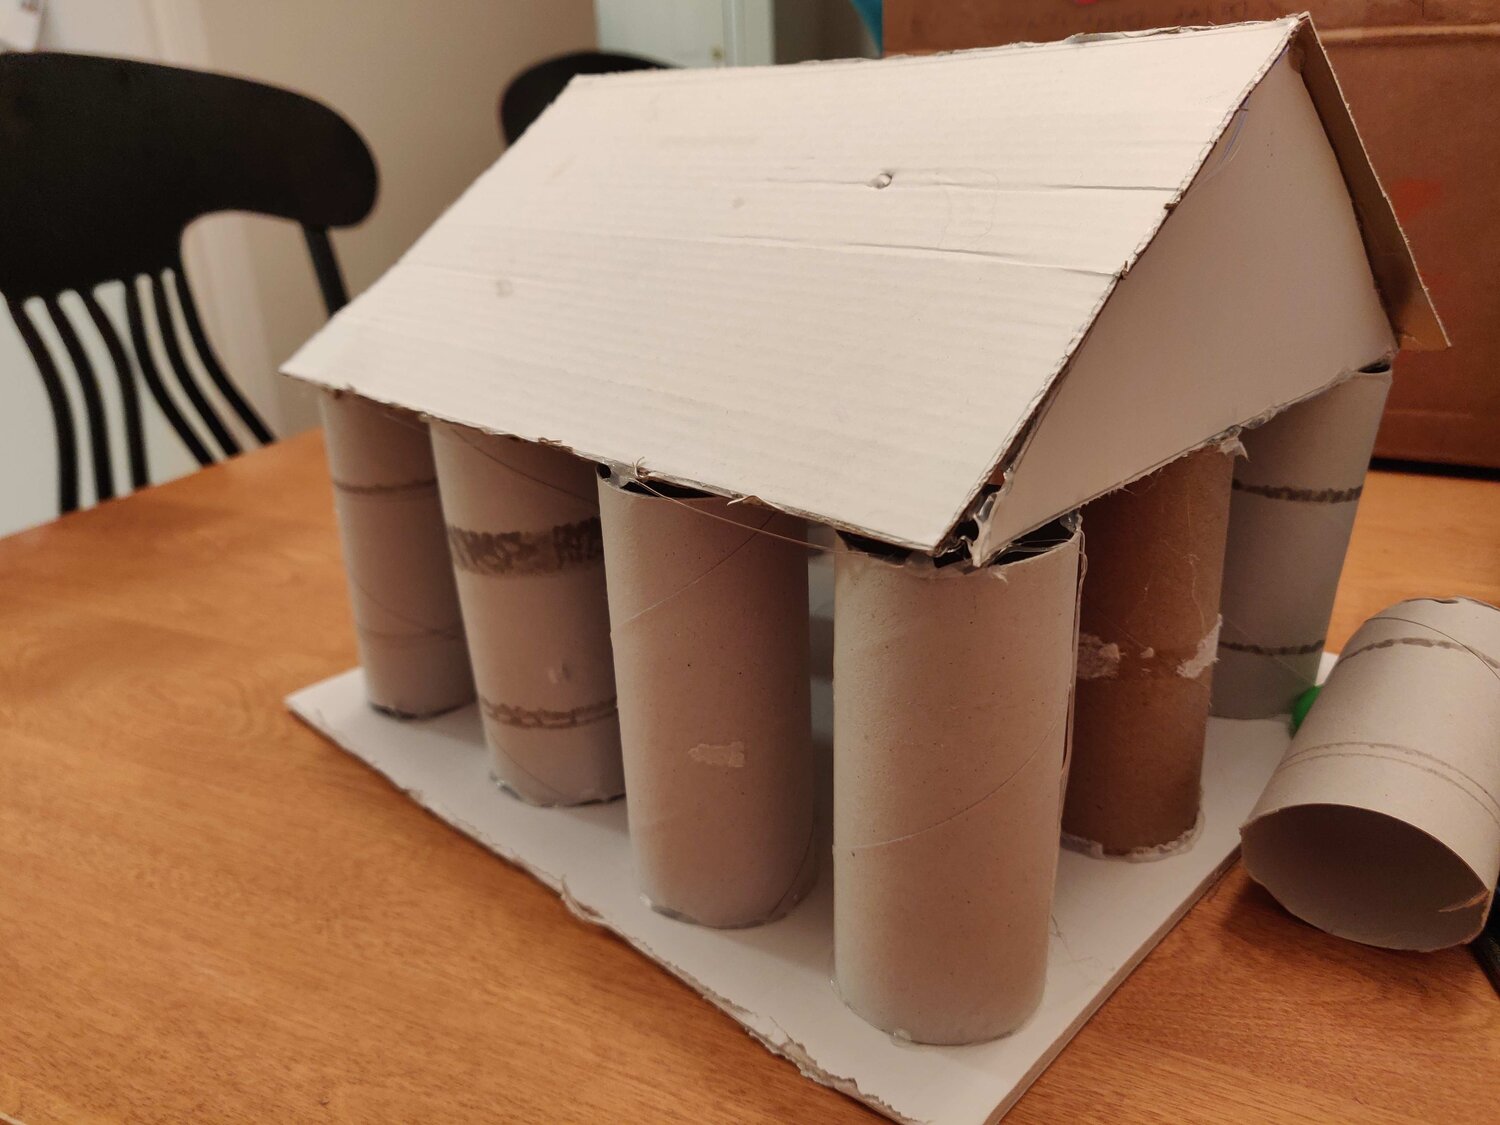
Step 7: Paint or color your creation however you want!

91232867_223030955564203_3515281052165734400_n.jpg

Recent Posts

  • Exploring Palamidi Fortress with Family: the Greek revolution
  • Meteora For Kids: Ancient Monasteries on Greece’s Cliffside
  • ASCLEPIUS FOR KIDS: The Greek god of medicine
  • EPIDAURUS FOR KIDS: Unveiling Epidaurus: Ancient Healing Sanctuary in Greece
  • Mindfulness techniques for kids: rose and thorn

Recent Comments

  • jwynands on My Baby is a Dinosaur
  • Gian Hermano on My Baby is a Dinosaur
  • Shone on What is a Growth Mindset and Why is it helpful?
  • Michaelheivy on What is a Growth Mindset and Why is it helpful?
  • Werkaandemuur.nl on The Coolest Spelling Lists for Grade 4 and 5

Archives

  • October 2024
  • May 2024
  • April 2024
  • June 2023
  • May 2022
  • March 2022
  • February 2022
  • January 2022
  • December 2021
  • November 2021
  • August 2021
  • May 2021
  • April 2021
  • March 2021
  • February 2021
  • January 2021
  • November 2020
  • October 2020

Categories

  • Activites
  • Blog
  • Brain
  • CircuitMess Nibble
  • Kids
  • Learn
  • Parents
  • Uncategorized

Meta

  • Log in
  • Entries feed
  • Comments feed
  • WordPress.org

Email Subscription

loader

For different subscription options sign up here.

Follow Us

Search this site

Jenny Mouse Headshot

Navigation

  • Kids
  • Adults
  • Growth Mindset
  • World Schooling
  • Blog
  • About Us
  • Contact Us

Terms and Policies

  • Terms
  • Privacy Policy

© 2025 Traveling Chalkboard

Theme by Anders Noren — Up ↑